This requires a little bit of configuration. After that, it automatically downloads song titles, album cover art and more. Best of all, it is easy and it takes very little time to master the CD "ripping" process.
Here's what you need to get started:· Access to the Internet
· Windows XP or Windows Vista
· A little space on your hard drive (at least 250 megabytes)
Just follow these easy steps:
Open Windows Media Player by clicking the Windows Start Menu > Accessories > Entertainment >Windows Media player.
The Windows Media Player will appear shortly.
If you do not see the menu bar in the windows media player, then check out the interface to access the menu bar.
Choose Tools>Options to bring up the Option Dialog box.
Then:
· Click the Change button to allow you to select an output folder.
· Click the Format dropdown list to choose from either WAV, MP3 or Windows Media Audio (WMA) formats.
· You can drag the Audio quality slider to balance between smaller file size and higher sound quality, as necessary.
· Click on OK to apply the changes.
These become your default settings and Windows Media Player will remember them the next time you want to rip (convert) CD audio tracks.
Now to convert CD tracks:
Run windows Media Player
Place an audio CD in your CD drive.
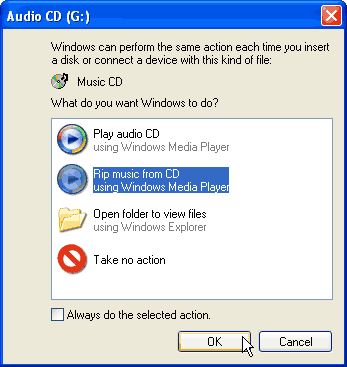
The following dialog box will appear-
Choose the Rip music from CD option to automatically convert all your tracks to the selected output format in the selected folder.
 appear-
Choose the Rip music from CD option to automatically convert all your tracks to the selected output format in the selected folder.
That’s it! Done! You have converted your tracks to the format you had selected!
Another simple
option:
- Launch Windows Media Player.
- Make sure that the CD tracks are visible.
- Click the prominent Rip Music icon/button.
It will take a little while! Anyway, finally you have your tracks ripped and converted!
Enjoy your music!
Copyright © 2008 Laila Rajaratnam. All Rights Reserved


No comments:
Post a Comment